Sunday, 30 December 2012

Exercise - A menu card

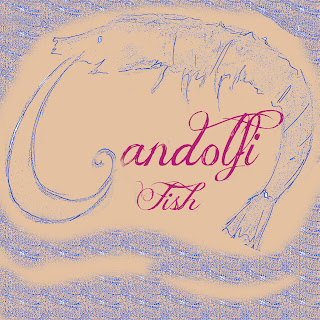
This exercise asked us to come up with an illustration for a chain of  contemporary fish restaurants who are known for the quality of their products. The image is to be used on a menu card but may also be used on signage and vehicles etc and therefore would have to be relatively simple/ easy to translate.

I began by looking at various other styles of logos for fish restaurants and found that a lot of styles incorporate a fish design / emblem of some sort sometimes in with the text and often colours are kept to a minimum.
Food illustration is something which interests me and I really like the style of Emma Dibben and know she has produced some watercolour images of fish etc which are used as part of a Waitrose campaign. I considered producing some sketches in this style but thought that for this exercise something perhaps simpler and less detailed would be more appopriate and would stand out.

I played with some ideas in my sketchbook considering various shapes of fish / fish related things including fishing nets, waves etc.
At this point I remembered about one of the famous Glasgow based fish restaurants - Gandolfi Fish and I thought that trying to imagine the logo / illustration being for them would help me in my ideas. I considered incorporating the name of the restaurant to the design and echoing the "G" of the cafe with the shape of the fish/ shrimps. I quite liked some of these and came up with a few alternatives.


like the idea but think it needs to be more than just a watercolour illustration


This one looks more suitable for a fish and chip shop and doesn't look as high quality.


The shrimp/prawn was most appealing for me in terms of design but I didn't think that the watercolour alone was particularly strong or stood out. I then thought about trying to create a sort of relief/ print effect with limited colours and generated some ideas using photoshop - using invert and experimenting with filters.


Colour variation


Final illustration


The colours variations which could be created are vast but I thought that something relatively simple and monocromatic would be easy to reproduce on stationery, menus etc and signage.
I used a blue shade to reinforce the fresh sea appeal and think that the logo works well at different sizes including the specified size 4 x 4 cm for the menu.
I produced a mock- up to see how it would look on a menu and think that it works fairly successfully as a logo illustration.
I quite enjoyed this exercise and its made me really look at logo and sign design and whether something is successful to attract attention and fit for purpose.


Friday, 28 December 2012

Exercise: Children's book cover Animals from Around the World

This exercise asked us to produce a cover illustration for a childrens book cover to make children select it from the shelf. The target market is 7 - 11 year olds.
The book  "Animals from Around the World"  is a natural history book which suggests to me the book is knowledge based perhaps something like a reference or encyclopedia type book.

I began by doing some internet searches to look at different styles of illustrating animals. I considered what animals and how many would be appopriate to include on a front cover design and looked at different styles of illustration some which were almost cartoon like representations and others which were more accurate representations. I also felt that the books that were more educational seemed to have actual photographs on the front cover with text as opposed to being an actual illustration.


Bearing in mind the brief which was to make the cover modern, appealing and different from the usual offering, I experimented with different styles of illustration and with composition in my sketch book. I decided to work to an A4 size format for ease of viewing and to work portrait.

Immediately, I began to think of having a globe with animals going round it although there are numerous variations of this idea already available in different formats.

I then thought about just doing some detailed realistic illustrations of animals and arranging them around a page with text.

Other ideas from this sketchbook stage included having a sort of silhouette style outline of a lion/ animals ( I initially thought a lion as its seen as one of the major animals) and having a sunset.

Taking these ideas forward I produced illustrations in pastel for the sunset idea and watercolour/ pencils of the globe and animal ideas.

I then took my selection of works to photoshop and explored the composition further.

For my globe style illustration I thought a blue background would work to bring out the image and I kept my illustration style quite loose.

The one with the more detailed drawings I found it hard to unite the image and thought it looked a bit disjoined as I struggled to find something in the background that would bring it all together.

The silhouette image was working better but I thought that perhaps the lion on its own didn't accurately represent the book so I added in an elephant and giraffe and used photoshop to enhance the colour of my pastel drawing.


Experimenting with font positioning - think the bottom one kepts the title together.


Having produced these I wasn't entirely satisfied and remembered that from the last assignment my tutor had suggested that my style was coming through in some of the looser watercolour style drawings which I produced by just drawing with the brush. I also was thinking about some of the other illustrators I have been looking at including Jill Calder, Christopher Corr and Laura Carlin and thought perhaps some simplified representations of animals might be more modern and fit the brief.

Christopher Corr


Online image accessed 28th December 2012 Available from
http://www.illustrationweb.com/artists/ChristopherCorr/gallery/352


I produced illustrations in this style and then placed them in photoshop with no background colour and actually think they look quite strong. Although, I would be really grateful of some pointers from my tutor on the success of this sort of work.


Another idea which I wanted to have a go with was producing a more type based illustration with animals or animal print incorporated to the lettering. I produced an initial line drawing and struggled to think how best to colour this. I settled on watercolour and pencil although once I get a proper chance would like to try colouring digitally in illustrator. My initial thoughts about the colours to use were bright and bold but to avoid stereotypical colour choices for children I limited my palette as I had done in my previous mock ups using oranges, yellows and blues with some small accents of other colours.
I thought this was reasonable successful but if I was to choose a final piece I would say the looser style mock up would be my preferred choice.


Overall, this was another useful exercise at exploring different types of illustration appropriate for purpose and in considering how to compose/ unite a final cover.
I think with time and experience obviously my ability to produce a more professional piece will improve but I think that the exercise was fairly successful in sticking to the brief and coming up with some interesting ideas/ alternatives which are eye catching.

Monday, 24 December 2012

Museum posters


The brief for this exercise was to produce a rnage of museum posters for different age groups namely 5- 9, teenagers and general adult audience.

I started this exercise as per other ones by looking at examples of other musuem posters to get a feel for styles content etc.

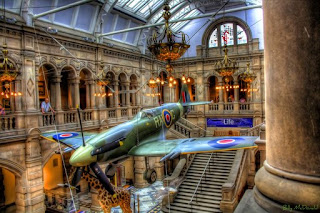
I then visited a few museums taking my camera to document interesting exhibits / pieces which I thought could feature in my posters. I visited the national museum in Edinburgh and the Kelvingrove Art Gallery in Glasgow.


From my photographs I produced some sketchbook brainstorming style ideas thinking about what exhibits would make interesting, appealing posters for each of the groups.


Looking at other museum poster styles - bright colours, simple strong shapes.


Considering how to illustrate exhibits - watercolour , shape outlines, different angles


Starting with the youngest age range I thought that something large and attention grabbing is usually pretty appealing to young children who can be easily distracted. From my visit to the musuem I noticed that Sir Roger the Indian Elephant received a lot of attention from young children. I considered different view points - straight on, full size drawing or perhaps taking the elephant and having sections of it on the posters asking the kids to guess what sort of animal they'd see (however I decided this was getting too complex).

I then considered adding characters and having kids looking up at the elephant showing the scale of the exhibit in comparison to the children. I produced some paintings of the elephant from different view points trying to show the texture and tonal qualities of the exhibit and kept the colours representative of the actual elephant. I added some characters and came up with idea of having a strapline which could link all the posters - "Who will you meet?". I also decided that a common museum logo would unite all posters in my range and selected some bold text to create a text logo. I quite liked some of my ideas but started to experiment in photoshop and thought perhaps a simpler representation of the elephant might be more appopriate for the young age group. I did some simple cut outs of the elephant exhibit shape and after photoshop experimentation with shadows and colours came up with something which I think looked quite eye catching and appropriate which just had the elephants face as the main focus. Colour scheme wise I initially was thinking young kids, bright colours to grab attention, but trying to avoid being stereotypical thought that by having a limited colour scheme yet still with some bright colours it might do the job. I also considered having a bright elephant but to me it didn't look right.


Next the middle teenage age range. There's a hanging wooden exhibit of glasses showing very bold eyes which I thought might be appropriate for teenagers who are always very image conscious! I thought that perhaps just having a simple drawing of these with some text would be effective and I kept a similar theme to the previous poster with logo and slightly altered the strapline to "Who will you see".


For the general audience poster I focused on one of the major talking point exhibits in the gallery namely the hanging heads (which consists of lots of heads with various expressions suspended from the gallery ceiling)
I think these look almost eerie but are quite something to see and think they do appeal to a general audience.
I produced some pencil sketches and watercolour versions selecting interesting heads to draw.
I considered whether to just have one head in the poster or mulitple but thought that multiple gave a better impression of the exhibit. Colour scheme wise I wanted to make the heads almost ghost like/ scary and after experimenting with different colour schemes thought that a black and white with yellow text was most appealing.

Overall, I think the posters are relatively successful in that they all look like they could come from the same place yet are suitable and targeted to the individual audiences. I resisted the temptation to over complicate images and go overboard in experimentation with Photoshop using filters etc to create interesting effects as I'm certainly learning that simple can be most effective unless you are highly skilled using Photoshop.